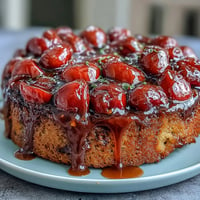
 Save to Pinterest
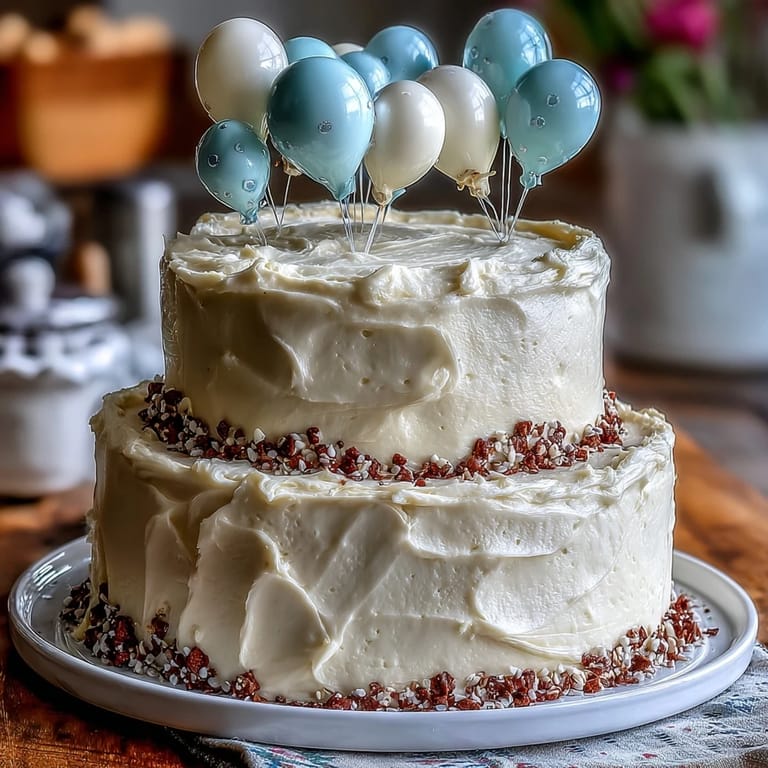
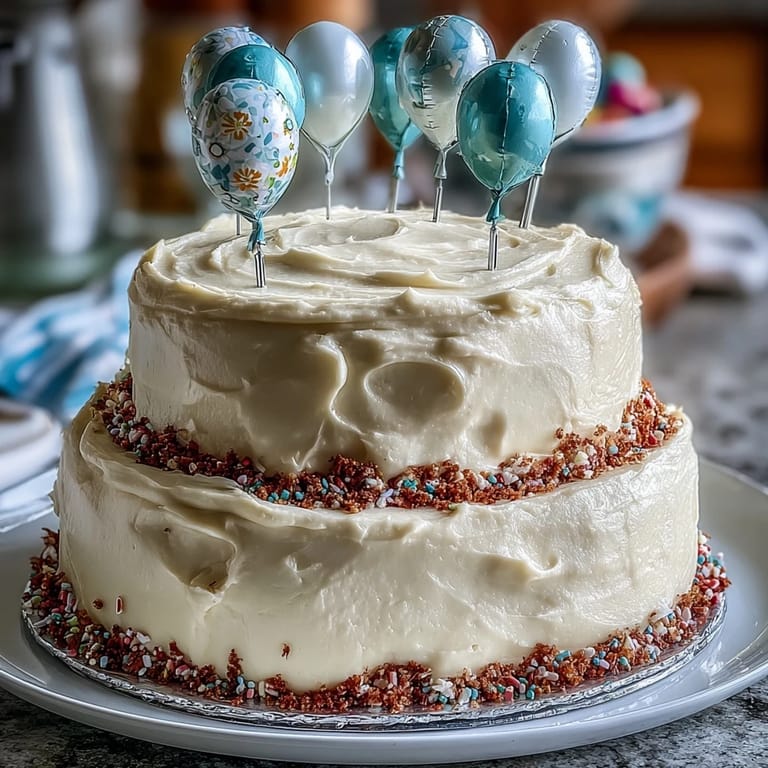
 My cousin called me three weeks before graduation asking if I could bake her cake—not just any cake, but a two-tier masterpiece with those little balloon toppers she'd seen on Pinterest. I'd never attempted a tiered cake before, but something about the excitement in her voice made me say yes before my nerves could catch up. Standing in my kitchen that Saturday morning, flour everywhere and my mixer humming steadily, I realized this cake would be the centerpiece of her celebration, the thing people would remember alongside the photos and speeches.
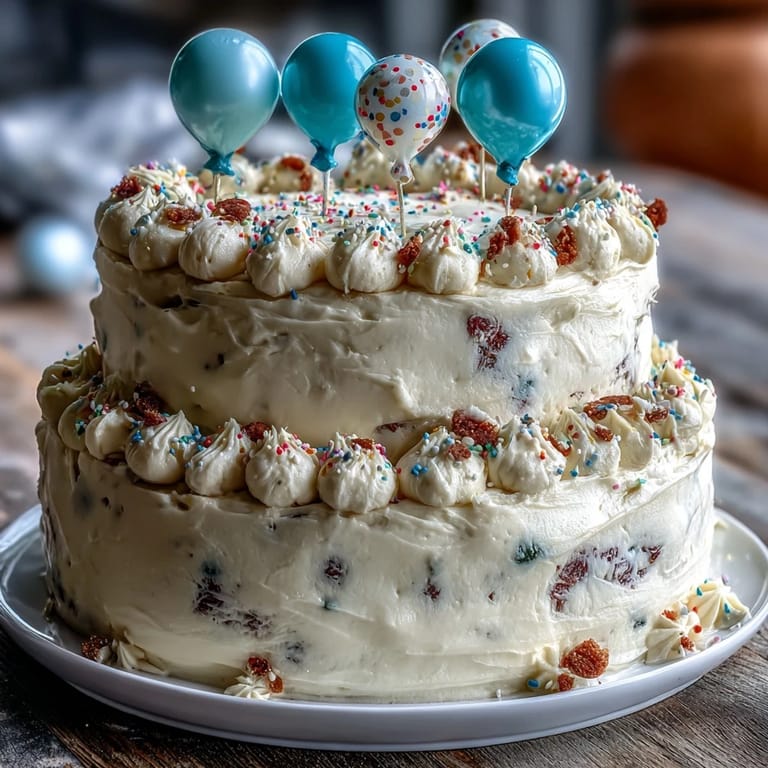
When I pulled those finished cakes from the oven, the kitchen smelled like pure vanilla and butter—the kind of smell that makes people wander in asking what's happening. My cousin came over for the assembly, and we frosted together while listening to her graduation playlist, laughing when I accidentally got buttercream in my hair and she had to point it out. By the time we stacked that smaller tier on top and nestled those tiny balloons into the frosting, we both stepped back and actually gasped—it was beautiful, and we'd made it together.
Ingredients
- All-purpose flour: The backbone of a tender crumb; make sure it's fresh and not packed down in the bag.
- Baking powder: This is what gives you that light, airy texture—don't skip it or use baking soda as a substitute.
- Unsalted butter: Room temperature is non-negotiable here; cold butter won't cream properly and you'll lose that fluffy structure.
- Granulated sugar: Beaten into butter until pale and billowy, it aerates the batter and creates a tender crumb.
- Large eggs: Also room temperature; they incorporate more evenly and help bind the batter smoothly.
- Pure vanilla extract: The real stuff makes a noticeable difference in flavor compared to imitation.
- Whole milk: Room temperature ensures even mixing and prevents the batter from seizing up.
- Powdered sugar: Sift it before measuring to avoid dense buttercream; lumps will show up in your frosting.
- Heavy cream or milk for frosting: Adds richness and helps achieve that perfect spreadable consistency.
- Gel food coloring: Optional but transforms your cake into school colors; it won't thin the frosting like liquid coloring does.
- Balloon toppers: These little decorations do the heavy lifting visually—store-bought ones save time and look polished.
Tired of Takeout? 🥡
Get 10 meals you can make faster than delivery arrives. Seriously.
One email. No spam. Unsubscribe anytime.
Instructions
- Set up your workspace:
- Preheat the oven to 350°F and prepare your pans by greasing them generously and lining the bottoms with parchment paper. Having everything ready before you start mixing is the difference between a smooth process and frantic scrambling.
- Mix your dry ingredients:
- Whisk flour, baking powder, and salt together in a medium bowl; this ensures the leavening is evenly distributed throughout the cake. Set this aside while you move to the next step.
- Cream butter and sugar:
- In a large bowl, beat room-temperature butter and sugar together for 3 to 5 minutes until the mixture is pale, fluffy, and noticeably lighter in color. This aeration is crucial—you're incorporating tiny air pockets that make the cake tender.
- Add eggs one at a time:
- Beat each egg in fully before adding the next; this prevents a broken, curdled-looking batter and ensures even incorporation. Listen for the mixer to sound smooth rather than splashing.
- Incorporate vanilla and alternate wet and dry:
- Mix in vanilla extract, then on low speed, alternate adding the flour mixture and milk in three additions, starting and ending with flour. Stop as soon as everything is combined—overmixing develops gluten and toughens the cake.
- Divide and bake:
- Pour batter evenly into the 8-inch and 6-inch pans, tap gently to release large air bubbles, then bake the larger cakes for 35 to 40 minutes and smaller ones for 25 to 30 minutes. A toothpick inserted in the center should come out clean or with just a few moist crumbs clinging to it.
- Cool with patience:
- Let cakes rest in their pans for 10 minutes—this firms them up so they turn out cleanly—then flip them onto wire racks to cool completely. Rushing this step leads to crumbly layers that fall apart during frosting.
- Make the buttercream:
- Beat room-temperature butter until creamy, then gradually add sifted powdered sugar while beating, adding milk or cream a tablespoon at a time until you reach a smooth, spreadable texture. If you want color, add gel food coloring drop by drop and beat until even.
- Level and layer:
- If your cake tops have domed, slice them level with a serrated knife or cake leveler. Place one 8-inch layer on a cake board, spread buttercream between layers, stack the second 8-inch cake, then repeat with the 6-inch layers.
- Apply the crumb coat:
- Spread a thin, even layer of buttercream over both cakes—this seals in crumbs and gives you a clean surface for final frosting. Chill for 20 minutes to firm it up.
- Final frosting and stacking:
- Frost both cakes smoothly with remaining buttercream using an offset spatula, then carefully center the 6-inch tier on top of the 8-inch tier. Use dowels or food-safe straws inserted vertically through the bottom cake to support the weight of the top tier.
- Decorate with flair:
- Insert balloon toppers into the frosting on top and around the cake, add edible confetti or sprinkles if desired, and step back to admire your creation.
 Save to Pinterest
 When my cousin cut into that cake at her graduation party, the cake layers were perfectly moist, the frosting was smooth and didn't crack, and the little balloons caught the light in the sweetest way. Watching her face as people congratulated her and told her how beautiful the cake was—that's when I understood why people bake for milestones, why this particular cake mattered more than just dessert.
Sizing and Serving
A two-tier cake with 8-inch and 6-inch tiers yields about 20 to 24 servings depending on how generously you slice. If you're expecting fewer guests, you could make just the larger 8-inch cake and skip the tiering altogether—the recipe works equally well as a single layer cake, though it won't have quite the same visual impact.
Make-Ahead and Storage
Baked cake layers keep for two days wrapped tightly at room temperature, or up to a week in the freezer—actually, frozen layers are easier to frost because they're sturdier. Buttercream frosting also freezes beautifully for up to two weeks, though you'll want to let it come to room temperature and re-beat it slightly before using so it regains that fluffy texture.
Flavor Variations and Personal Touches
The vanilla base is forgiving enough to build on—add a quarter teaspoon of almond extract for subtle nuttiness, or a tablespoon of fresh lemon zest to the batter for brightness. You could also thin a bit of buttercream with milk and paint the cake board with the graduate's school colors, or tint the frosting in stripes, though simpler is often more elegant.
- Swap out plain vanilla by infusing a touch of almond or lemon extract into both the cake and frosting.
- Use the graduate's school or favorite colors in the frosting or confetti for a personalized touch.
- Consider fresh berries between layers if you're serving the cake the same day—they add brightness and prevent the cake from tasting too sweet.
 Save to Pinterest
 This cake isn't complicated, but it feels special—the kind of thing that makes you proud to have made it from scratch. Serve it cold, cut the slices with a hot wet knife between each slice, and watch people's faces light up.
Recipe FAQs
- → What pans are used for the cake layers?
Two 8-inch and two 6-inch round pans are used to create the double-layered effect.
- → How is the buttercream made smooth and spreadable?
Butter is beaten until creamy, then powdered sugar and vanilla are gradually added along with milk or cream until achieving a smooth texture.
- → Can the cake be customized with colors?
Yes, gel food coloring can be added to the buttercream to match a specific color theme.
- → How should the tiers be stacked safely?
Use cake dowels or straws inside the bottom tier to support the smaller top tier and prevent shifting.
- → What decorations complement the balloon toppers?
Edible confetti or sprinkles can be added to enhance the celebratory look without overpowering the design.