 Save to Pinterest
 My neighbor handed me a candy apple at a fall festival a few years back, and I bit into it expecting the usual sticky mess—but this one was different. Instead of that thick, jawbreaker coating, the apple slice she'd made had this elegant caramel layer that gave way to crisp fruit with just a whisper of dark chocolate on top. I stood there in the middle of the crowd, completely charmed by how simple it was, and asked her right then how she did it. She laughed and said it was less about technique and more about not overthinking it. That conversation stuck with me, and now these candy apple slices have become my go-to when I want something that feels fancy without any fuss.
Last winter, I made these for my kids' school bake sale without telling them what was inside the box. When they unwrapped them in the kitchen, my daughter's eyes went wide and she said, "You made candy apples?" like I'd performed some kind of magic. The best part was watching people actually slow down to savor them instead of wolfing them down like most baked goods. That taught me something: sometimes the simplest things feel the most special when they're homemade.
Ingredients
- 2 large crisp apples: Granny Smith or Honeycrisp work beautifully because they stay firm and their tartness cuts through the sweetness perfectly—avoid softer varieties that turn mealy when dipped.
- 1 tablespoon lemon juice: This small amount keeps your apples from oxidizing and browning, but don't skip the patting dry with paper towels or your caramel will slip right off.
- 1/2 cup soft caramel candies: Unwrap them fully before you start; I learned this the hard way when I accidentally left a few in their wrappers and spent five minutes fishing them out of the saucepan.
- 2 tablespoons heavy cream: This transforms the caramel from thick and crumbly into something smooth and dippable—no substitutions here if you want that silky coating.
- 85 g dark chocolate: Choose 60 to 70 percent cocoa for complexity; anything darker tastes bitter and overpowers the apple.
- 1 teaspoon coconut oil or butter: This thins the chocolate just enough to drizzle without making it greasy—tempering isn't necessary for this casual, rustic look.
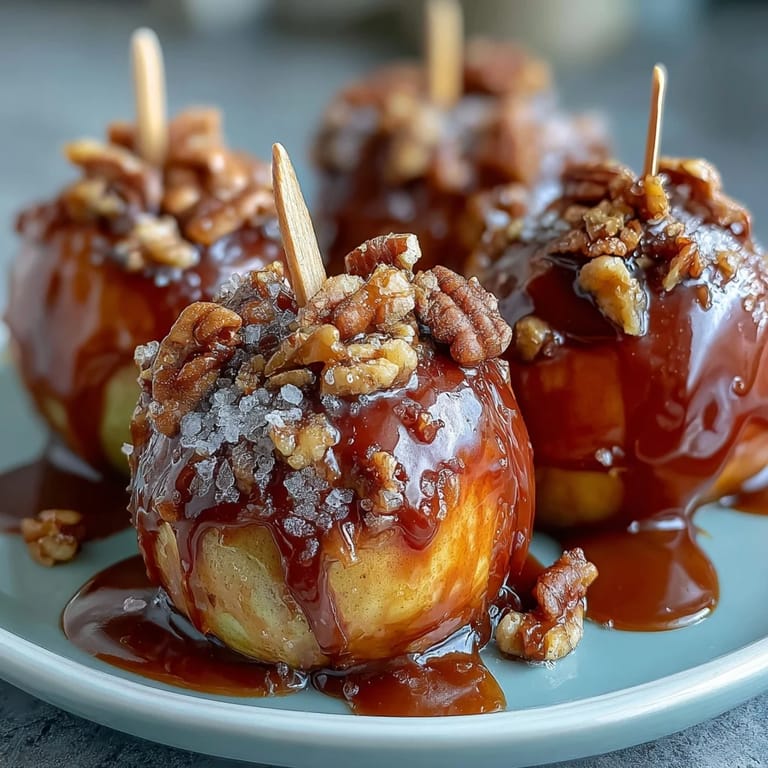
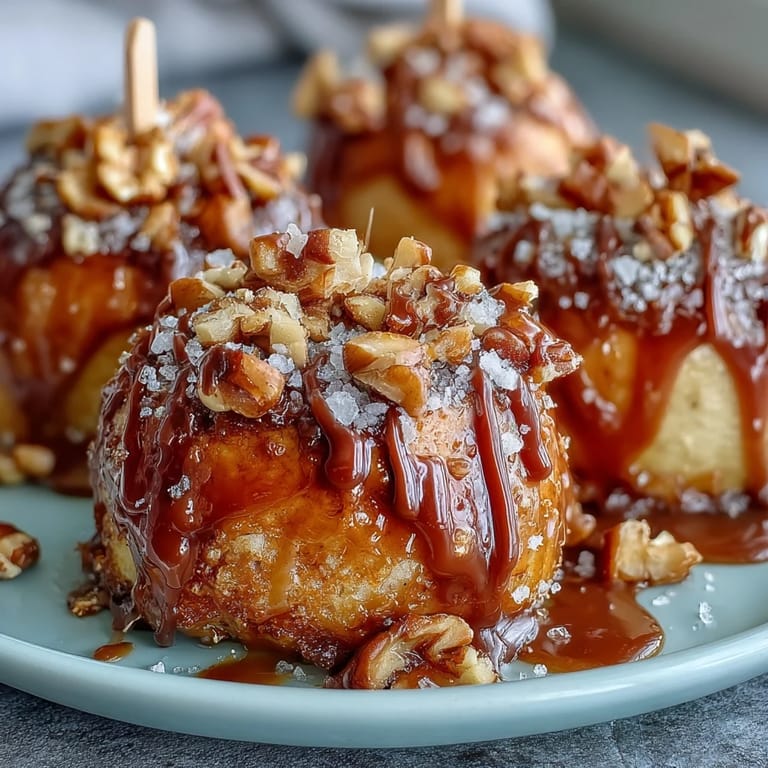
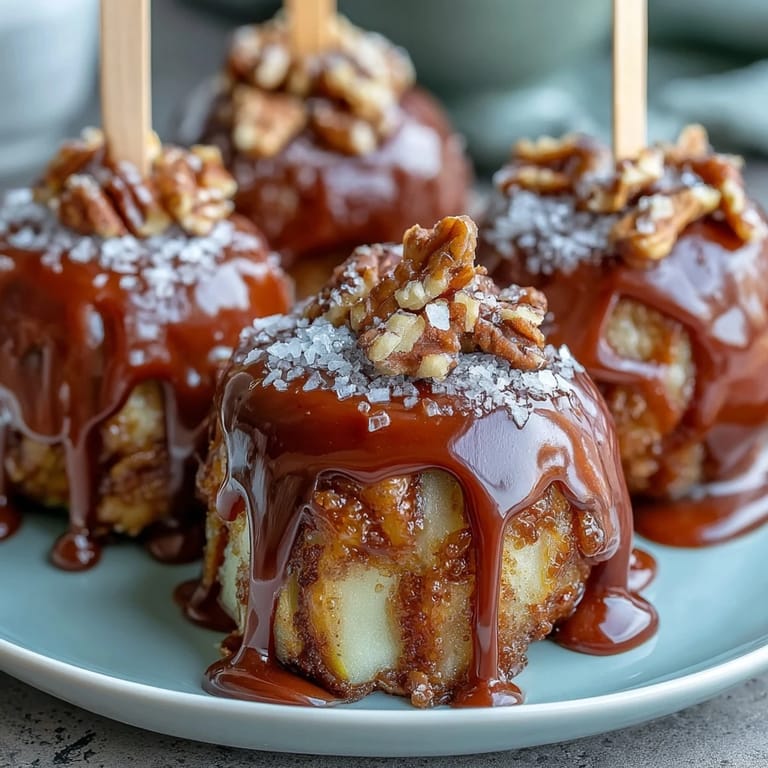
- Garnishes: Toasted nuts add crunch, sprinkles bring joy, and a pinch of flaky sea salt is the secret that makes people ask what's different about yours.
Tired of Takeout? 🥡
Get 10 meals you can make faster than delivery arrives. Seriously.
One email. No spam. Unsubscribe anytime.
Instructions
- Prep Your Apples Like You Mean It:
- Slice your apples into wedges, then toss them gently with lemon juice and pat them completely dry—any moisture will cause the caramel to bead up and slide off like it's avoiding you. This step takes two minutes but makes all the difference.
- Give Each Slice a Handle:
- Push a popsicle stick or sturdy skewer into the wide end of each slice at a slight angle, so it feels secure and balanced. You want to hold these with confidence when you're dipping.
- Melt Your Caramel to Silky Perfection:
- Heat the unwrapped caramels with heavy cream in a small saucepan over low heat, stirring gently until they're completely smooth and glossy. Let it cool for just 2 to 3 minutes so it's warm enough to cling to the apples but cool enough not to scald your fingers.
- Dip With a Light Hand:
- Hold each apple slice by its stick and dip it halfway into the caramel, letting any excess drip back into the pan for a few seconds. The goal is a coating that looks intentional, not shellacked.
- Give the Caramel Time to Set:
- Arrange your coated slices on parchment paper and pop them in the refrigerator for 5 minutes so the caramel firms up before you add chocolate. This prevents the two coatings from sliding around and creating chaos.
- Melt Chocolate Like You're Treating It Gently:
- Chop your dark chocolate and mix it with coconut oil, then microwave in 20-second bursts, stirring between each one so it melts evenly without seizing. Stop as soon as you see it's almost melted and let the residual heat finish the job.
- Drizzle With Purpose:
- Use a spoon or squeeze bottle to create thin, deliberate lines of chocolate across each caramel-coated apple, letting some drip down the sides for that handmade look. The chocolate cools quickly, so work steadily but without rushing.
- Garnish Before the Chocolate Sets:
- If you're adding nuts, sprinkles, or sea salt, do it immediately while the chocolate is still tacky enough to hold them. If you wait, they'll just roll off.
- Chill Until Everything Is Set:
- Give it another 5 to 10 minutes in the refrigerator so the chocolate hardens and everything feels secure when you bite into it. These can be served chilled or at room temperature, depending on your mood and the season.
 Save to Pinterest
 There was this one afternoon when my sister came over unexpectedly and caught me in the middle of making these, with apple slices lined up on parchment paper like little soldiers waiting for their caramel armor. She sat on the counter and we talked about nothing important while I worked, and somewhere between the first dip and the final sprinkle, an ordinary Wednesday became something I actually remember. That's when I realized these aren't just candy apples—they're an excuse to slow down and do something with your hands while you're with people you like.
Why Temperature Matters More Than You'd Think
I used to make caramel too hot, thinking it needed to be piping hot to coat properly, and it would literally run off the apples like water. Now I let it cool for exactly 2 to 3 minutes, and it clings to the fruit with just the right amount of give. The chocolate melts faster than you expect, so watch it carefully in the microwave—it only takes one moment of inattention for it to go from glossy to grainy. Temperature is really just about patience, and these slices reward you for waiting those few extra minutes.
The Secret of Crisp Apples
The reason these taste so much better than traditional candy apples is that the apples stay crisp because there's no thick coating baking onto them. Your caramel layer is thin enough that it doesn't trap moisture or soften the flesh underneath, so you get that delightful crack and snap when you bite down. Granny Smiths are my preference because they're sturdy and tart, but Honeycrisps work too if you slice them fresh and use them right away. The fresher the apple, the crunchier the final result—don't make these more than a few hours ahead if you want that texture to stay perfect.
Customization and Storage Tips
These slices are endlessly adaptable depending on what's in your pantry or what mood you're in. Swap dark chocolate for milk or white chocolate, use different nuts or skip them entirely, add a tiny pinch of cinnamon or cayenne to the caramel if you're feeling adventurous. They're best eaten the day you make them while the apple is still crisp, but you can store them in an airtight container in the fridge for up to two days if you must. If you're making these for a crowd, you can prepare the apples and caramel in advance and do the chocolate and garnishes right before serving to keep everything at its peak.
- For a nut-free option, use seeds like pumpkin or sunflower, or skip garnishes entirely and let the chocolate and caramel shine.
- If someone at your table can't have dairy, you can use dairy-free chocolate and caramel, though you'll need to check labels carefully.
- Always slice your apples as close to serving time as possible to keep them crisp and prevent browning even with the lemon juice protection.
 Save to Pinterest
 These candy apple slices have a way of making ordinary moments feel a little more intentional and a lot more delicious. Make them when you want to feel like you've done something special without the stress.
Recipe FAQs
- → What apples work best for this dessert?
Firm, tart apples like Granny Smith or Honeycrisp hold their shape and provide a crisp contrast to the caramel and chocolate.
- → How do I prevent the apple slices from browning?
Toss apple slices in lemon juice before dipping to maintain their fresh color and prevent oxidation.
- → Can I substitute the dark chocolate with other types?
Yes, white or milk chocolate can be used for a sweeter variation, though dark chocolate offers a richer flavor contrast.
- → What are some garnish options for added texture?
Toasted nuts like pecans, almonds, or peanuts, colorful sprinkles, or a sprinkle of flaky sea salt add texture and flavor balance.
- → How should I store the prepared slices?
Keep them chilled in the refrigerator and enjoy the same day for optimal crispness and texture.
- → Is this dessert suitable for gluten-free diets?
Yes, as long as gluten-free caramel and chocolate are used, the dessert is suitable for gluten-free diets.